In part 3 of my ‘Getting Started With Zwift’ series I have a 10 minute video giving you a quick tour of Zwift, showing you the menus, shortcuts and basic information to make your first couple of rides simpler. The previous two articles are here:
‘Getting Started with Zwift’ – What Zwift is, and the gear you need to get started
Fitting Speed and Cadence Sensors – How to set Zwift up for use with a standard bike and turbo trainer.
Timeline
00:00 – Introduction and logging in
00:42 – The ‘Paired Devices’ page
01:25 – First view of riders screen/Watopia Island
01:52 – Top left display – Power/Cadence/Heart rate
02:15 – Top display – Speed/Distance/Elevation/Time display
02:32 – Right display – Map/Riders nearby
02:52 – Left display – Live results KOM/Sprint
03:10 – Pause menu – Main
03:52 – Pause menu – Challenges (Ride California/Climb Everest)
04:08 – Pause menu – Achievements
04:30 – Pause menu – Pair devices
04:48 – Pause menu – Customisations (Change jersey, bike, appearance etc)
05:08 – Pause menu – Settings
05:40 – Shortcuts
05:55 – Shortcut ‘T’ – User Customisation (Change jersey, bike, appearance etc)
06:40 – Shortcut ‘M’ – Group chat screen
06:58 – Shortcut ‘ESC’ – Exit and save ride
07:18 – Shortcut ‘A’ – Pair devices
07:35 – Shortcut ‘U’ – Toggle units between Kilometres/Metres and Miles/Feet
07:52 – Shortcuts ‘1-9’ – Toggle camera angles
08:20 – Shortcut ‘F10’ – Take photo
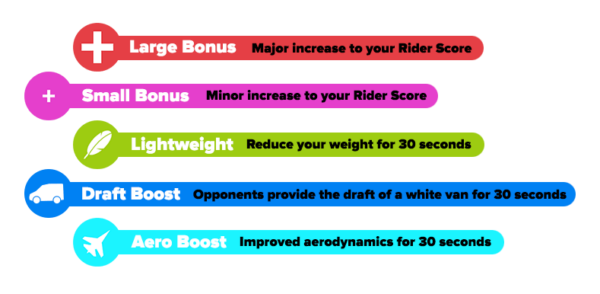
08:38 – Shortcut ‘Spacebar’ – Use power up and description of power ups 
10:20 – Summary
11:00 – Outro